 The Topic Type and Template Editor
The Template Editor allows you to quickly see which templates correspond to each Topic type in your project. Currently, you simply can view the appropriate templates, but you can't add any new ones visually yet.
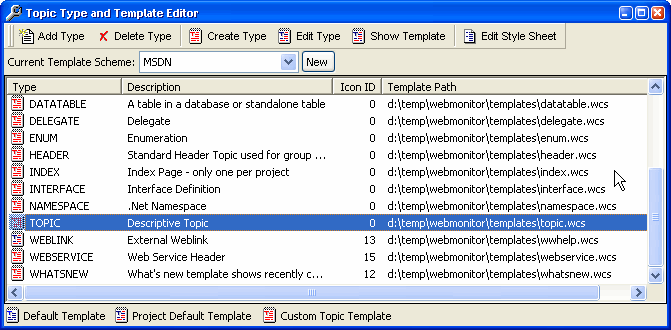
To use the Topic Type Editor you have to understand how Topic Types are handled in Help Builder.
- Each topic type has a matching template files (.wcs) in the project's TEMPLATES directory. So, topic has TOPIC.WCS and classheader has CLASSHEADER.WCS.
- You can delete the specific file and use the default project template which is WWHELP.WCS. If you want to have all or most topics use a single template to keep presentation maintanence to a minimum this is a good way to go.
- Topic types are mapped to two GIF images each and the images must exist or Help Builder will fail. Help Builder automatically creates to generic GIF icons with the name <TopicType>.GIF and <TopicType>_OPEN.GIF. You can replace these with custom 16x16 icons if you choose. Note that the icons are used only in the editor and in the HTML pages not in the final HTML Help file's content pane.
- Every template loads a master style sheet (TEMPLATES/wwhelp.css) which describes the basic font and background layout of the page for all the basic HTML tags (Body, H1-4, Table etc). By changing the stylesheet you can change the display attributes of the entire help file and any text that is not specifically marked up with custom style/font information.
- Help Builder supports template Themes which is a set of Template files for all the topic types in your project. You can copy the scheme and create new ones for different display styles. Help Builder always installs two sytles: HTML and Word. The Word template is more light weight removing all the tables and script code from topics and is used for generating MS Word output. You can create your own themes as needed
Adding and Deleting Topic Types
To add a new type simply click on the Add Type button on the toolbar. You'll be asked for name and description of the topic type which is then added to the list. This process creates a pair of default GIF files, but it does not create a new template for you automatically. Instead it points at the default template or templates\wwHelp.wcs.To delete a topic simply click the Delete Type button, which removes the two GIF images along with the reference to the topic. You'll also be prompted which type you would like to revert any topics that use this type to. The default is TOPIC.
Editing Templates
You can edit any of the templates by selecting a type and then clicking on the Edit button. Tempaltes are scripted HTML so you can modify the HTML and add and delete fields and logic that runs to display each topic. If you have an HTML editor configured (in the Properties Dialog) that editor is used. Here Visual Interdev is the editor: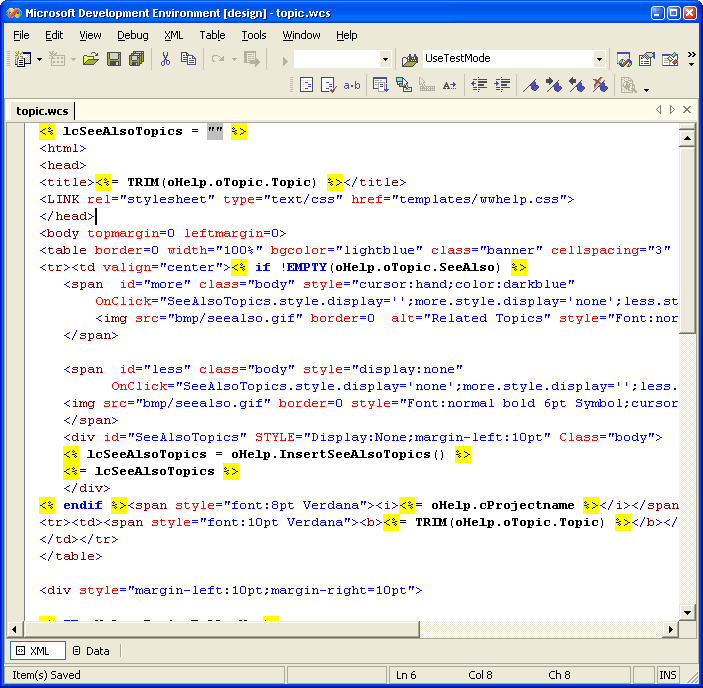
Editing StyleSheets
Stylesheets are edited by clicking on the Edit Style Sheet button. If you have an editor configured for CSS files the editor for it will pop up. Again here's Visual Interdev: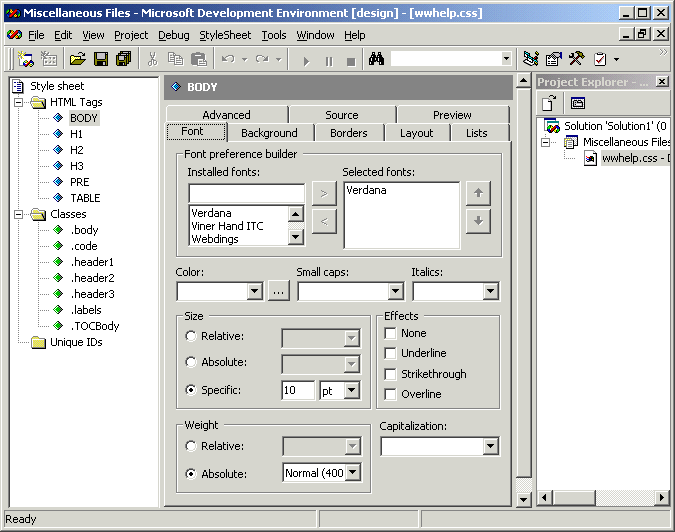
Making changes to any of the style definitions affect the entire help project. In particular the BODY tag is responsible for most of the type and the background color of each HTML document created.
The Topic Type Editor
The Topic Type editor allows you to interactively edit a topic topic. The editor looks like this: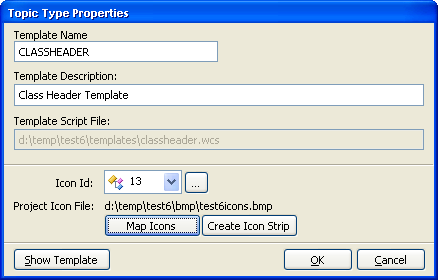
As you might expect you can edit the name of the template and its description. For informational purposes the filename of the template is displayed here too. Note that this value is read-only it can only show one of two values: The name of the topic type .wcs file or the default wwhelp.wcs, which is used if a specific template does not exist.
Icons
Icon management is a complicated topic. The options here allow you to attach a specific icon id to a topic type. You can then choose to export the icon definition as an icon strip file using the Create Icon Strip button.
Note
CHM files do not automatically use this icon strip unless you install it with your help file. You will need to install it in the Windows directory.
To assign an icon id pick one of the icons from the icon list. The list displays the icons from the current icon file and using the list you can assign a single icon to the current topic.
If you're just starting out with your help file it might help to preset the icon definitions. The Map Icons button allows you to create a default configuration. The default configuration has no icon assignments at all which will use the CHM stock icons in its default settings. Alternately you can use Help Builders Icon definitions which map to the icon strip found in wwHelpIcons.bmp (in the BMP directory of your project). Selecting either of these options sets the icon ids of each topic to match. Note that the icon strip has only 21 icons available (42 divided by two - each icon has 2 icons one regular one for 'expanded view), so not all topic types can be matched.
Once you've made all your icon assignments you can use the Create Icon Strip button to generate an icon strip. This strip will be a bit map file and is stored in the location you specified for your icon file.
Note
CHM files are very picky about the colors that work for icons. To be safe 16 color icons should be used. Alternately using Windows Safe 256 colors may or may not work correctly you have to experiment. For best results use the provided wwHelpIcons.bmp file. Although this icon file is not using the latest icons, it is color safe. The newer VS.NET 2005 style icons can be used for Web views. Note that we've provided default icons in both formats, so if you choose you can copy the icons in the BMP directory from your wwhelp/bmp directories.

Comment or report problem with topic