 Inserting Images into topics
Help Builder allows you to access images in three separate ways:
- Using the Image Dialog to link to an image on disk
- Pasting an image from the Clipboard with Ctrl-V
- Capturing an image from the screen using the built in capture utility
- Capturing an image from the screen using TechSmith's SnagIt
Using the Image Picker to link an image
The image picker dialog allows you to embed images from disk, or a Web URL into your topic.
You can use the image icon on the toolbar. Ideally you'll link to an image that exists in your images directory or any other directory that is relative below the project's root folder.
If the file is a relative path in the project the link is embedded as a relative link (ie. images/myimage.png).
If the image is a non-relative path, you are prompted to optionally copy the file to the project's image folder in order to create a relatively linked image that can be embedded into the help file.
Use Relative Image Paths
Although you can link a non-relative image paths from your local or network drives, this is not recommended as these images are not part of your project's hierarchy, and so are not compiled into the help file and not published to the Web server when publishing.
To insert an image simply place the cursor where you want to insert the image, then press the Image button (or Alt-I). A file picker pops up and you can select an image from disk. Select an image, and it's is linked into the document using standard Markdown syntax:

And voila your topic now looks like this:

You can also link a Web URL like this either directly or by using the image dialog:

Image Formatting
If you want to format the image display styling, you can fall back to HTML syntax for your image link which allows you to apply
styleorclassattributes to your image for positioning, margins and so on.<img src="images/webmonitor_sm.jpg" style="margin: 0px 10px 5px 0px;float: left;"/>
which can embed the image like this:

Pasting Images from the Clipboard (Ctrl-v)
One very convenient way to add images to a document is to use image pasting from the clipboard. There are lots of ways in Windows to capture images on the clipboard. Here are a few common ways to capture images to the clipboard:
- Copy Image in your Web Browser using Copy Image
- Copy Image from your favorite Image Editor
- alt-PrtScn or ctrl-PrtScn to capture screen or active window
To embed an image from the clipboard into your Help Builder topic:
- Move the cursor to the position to insert the image
- Press
Ctrl-V - Select a file name to store the image relative to the project folder
- Click OK
When done an image link is embedded into the page.
Screen Captures
Help Builder also allows you to directly capture images from the screen. It supports two modes - if you have TechSmith's SnagIt installed it will use [#SnagIt](SnagIt to capture images directly). Otherwise it will use the built-in screen capture form.
Built in Screen Capture
Help Builder provides a basic screen capture utility natively. Click the camera icon to start a capture, and you'll see a form like this:
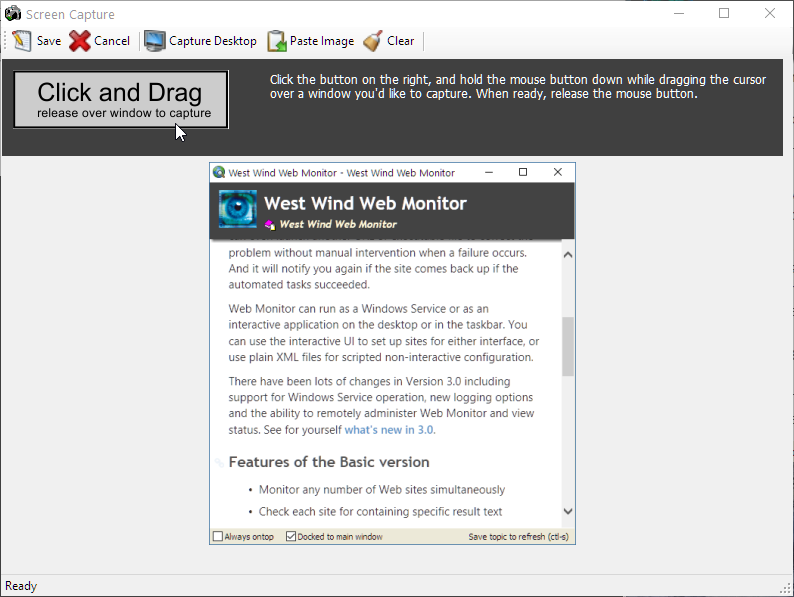
To capture a window, click the big button and hold it down, then drag the capture cursor (a big plus sign) over any window or control that you want to capture. Release to capture the window or control.
Once you've captured the window the content displays in the form as shown in the screen shot above displaying a captured preview window and you can then save the image to disk.
SnagIt Image Capture
If you have SnagIt from Techsmith installed, Help Builder allows you to use it to capture images using its Active Window Capture mode. SnagIt use must be enabled in the Options -> Help Builder Settings using the Use SnagIt for screen captures if available checkbox.
Once enabled using the Camera Icon immediately jumps you into SnagIt's own capture mode that lets you interactively select a window or other object to capture. Select your image, and when the Image Editor pops up, customize your image as needed and when done press the Finish button. You will be prompted to save the file in the project's image folder.
When you click OK, Help Builder pops up again and embeds the image into the document as shown before:

You can configure the image capture mode for SnagIt, by clicking the dropdown button next to the camera icon which brings up this form:
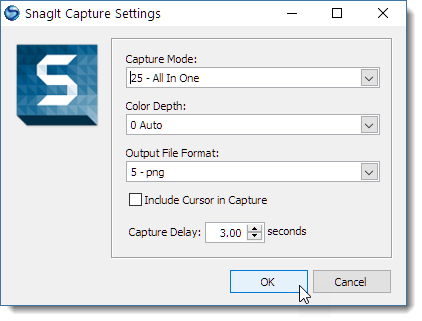
The settings you set here are used for subsequent SnagIt screen captures. You can optionally force these options to be shown before each capture.
See also
Step By Step Guide |
Comment or report problem with topic