 Importing .NET Types and Assemblies
Need to document your .Net classes and Assemblies? Help Builder makes it very easy to generate complete documentation for your classes utilizing the meta data available in .Net assemblies as well as any documentation you may have added in the source code via XML documentation. All it takes is a few quick and easy steps...
To import a single .Net type:
- Click on the Import Button on the main toolbar
- Select .Net Type from the drop down. You should see a dialog like this:
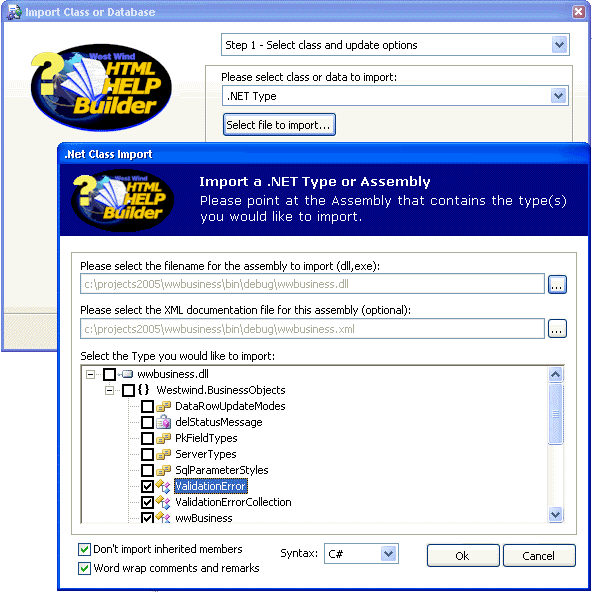
From this dialog select the assembly you'd like to import from. If an XML documentation file by the same name exists it's automatically selected for you. Otherwise you can select an XML documentation file from another location.
- Select the class from the list of classes provided. Note that if your assembly is large this can take a few seconds, especially the first time your importing.
- Select whether you want only non-inherited members to be imported. If inherited members are not imported only the methods you've implemented in your class will be shown, otherwise all inherited members also show up.
- Select whether you want word wrapping on the imported comments.
- Word Wrapping On
Help Builder will treat any single line break as a line continuation. This is similar to the way NDoc and the default HTML Documentation pages in VS.NET are generated.
- Word Wrapping off
Help Builder imports the text exactly as it appears in your XML comment with all linebreaks intact - the result of which is a non-justified layout of your text. This is useful if your comments rely on explicit line breaks in the text.
- Word Wrapping On
- Finally you can choose whether the documentation generates C# or VB.Net style Syntax signatures.
- Click Ok which returns you to the main form. Click the Next Button.
- Select the parent topic that you want your class to be imported under.
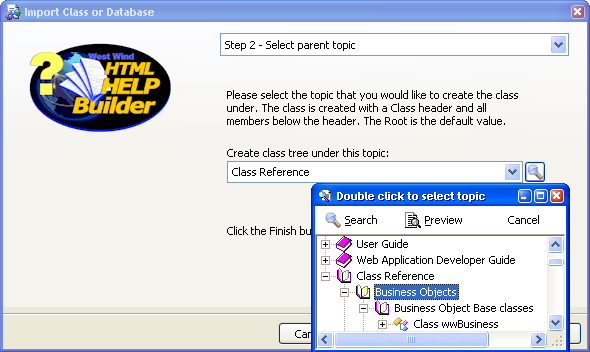
Note that you can - as shown above - use the Search Icon to select a parent topic easily using the topic browser and search window. The default selection is preset to the currently selected item in the main Help Builder IDE.
- Click Finish to import your class.
The imported class should look something like this:
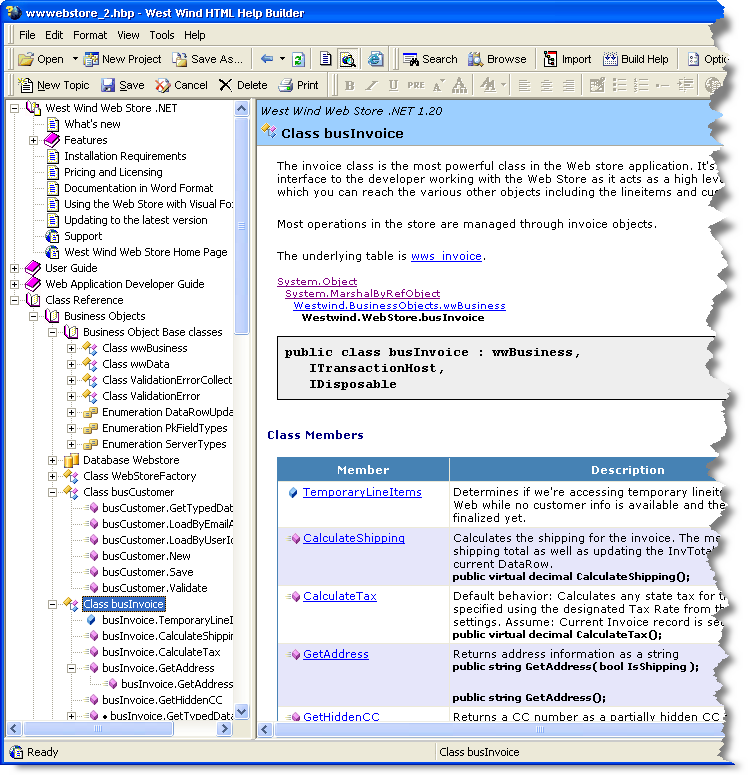
Please note that this class in the example contains copious XML Comments, which is why there is so much information provided for this particular topic. Without the XML comments you would only get the base signature information of name, type, parameters (for methods) and the like. To enable XML Comments make sure that you build your project with XML Comments enabled and outputting to the same directory as the binary of your application/assembly. You can set this option on the Project Properties | Build options Property Page for the XML Documentation File.
The process to import a full assembly with all of its types is nearly identical - you just don't select the class. An Assembly import groups classes into namespaces as parent topics.

Comment or report problem with topic